When it comes to designing engaging and visually appealing user interfaces, color plays a pivotal role. In the world of SwiftUI, Apple’s declarative framework for building user interfaces, setting the background color is a fundamental aspect of creating beautiful and immersive apps. In this article, we will delve into the various ways you can set background colors in SwiftUI and explore some creative techniques to make your user interfaces stand out.
Customizing Background Colors with SwiftUI
In SwiftUI, you have the flexibility to assign a background color to any view. If you aim to modify the background color for the entire screen, the `ZStack` is your go-to tool. Throughout this guide, we demonstrate how to establish a red backdrop with the help of a `ZStack`. To get started with SwiftUI, ensure you have Xcode 11 and MacOS Catalina. Beta versions for both are accessible via the Apple Developer portal.
- Launch Xcode and select ‘Create a new Xcode project’ from the startup window, or navigate to File > New > Project;
- In the template section, pick iOS for the platform and opt for the ‘Single View App’ template. Hit ‘Next’;
- Name your project as ‘SwiftUIBackgroundColorTutorial’, ensure the ‘Use SwiftUI’ option is checked, and then proceed by clicking ‘Next’;
- Finally, designate a directory on your Mac to save the project;
- On the canvas, hit ‘Resume’ to activate the preview;
- If you can’t see the canvas, navigate to Editor > Editor and Canvas to bring it into view;
- Within the Project navigator, select ‘ContentView.swift’;
- Now, modify the code inside the `ContentView` struct as follows:
struct ContentView: View {
    var body: some View {
        ZStack {
            Color.red
        }
    }
}
ZStack allows the creation of content layers that overlap. Within the ZStack, the color red has been designated. The background color is constrained to the safe area. To adjust the background color beyond the safe area, utilize the `.edgesIgnoringSafeArea()` modifier.
struct ContentView: View {
    var body: some View {
        ZStack {
            Color.red
            .edgesIgnoringSafeArea(.all)
        }
    }
}
The preview now reflects the background color adjustment beyond the safe area.
You can find and download the source code for ‘SwiftUIBackgroundColorTutorial’ from the ioscreator repository on Github.
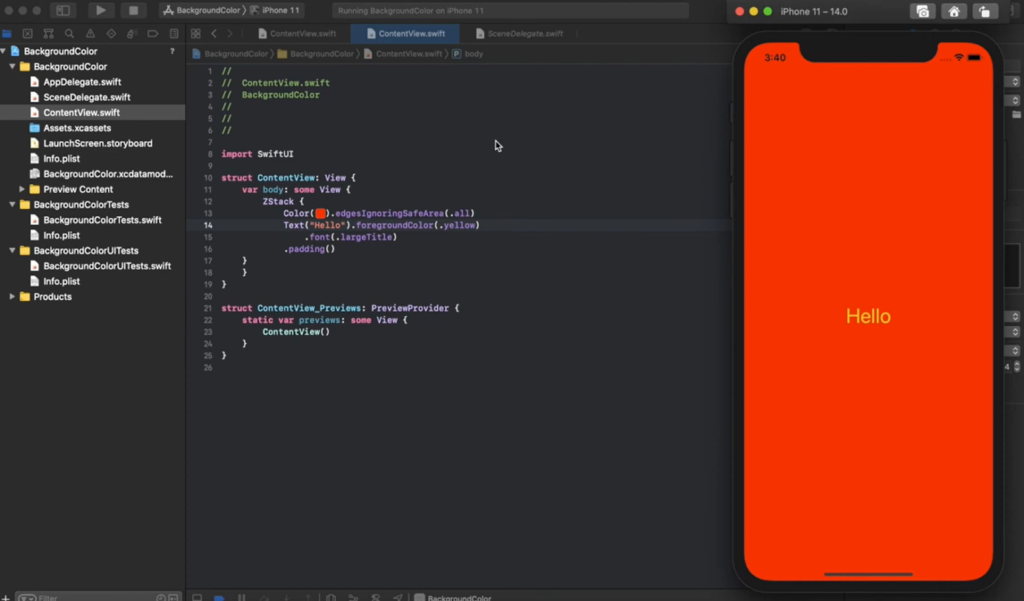
Alt: SwiftUI code in Xcode showing how to set a background color, a red screen with ‘Hello’ text
Using Conditional Background Colors
In many situations, you might want to change the background color of a view based on some conditions. This could be anything: data-driven changes, user interactions, or even random events.
Let’s imagine you want a view that, when tapped, toggles its background color between red and blue:
struct ContentView: View {
    @State private var isRed = true

    var body: some View {
        ZStack {
            Color(isRed ? .red : .blue)
                .edgesIgnoringSafeArea(.all)
                .onTapGesture {
                    isRed.toggle()
                }
        }
    }
}
Here, the `@State` property wrapper is used to create a mutable state for the `ContentView`. The `.onTapGesture` modifier allows us to alter this state when the view is tapped, effectively toggling the background color between red and blue.
Incorporating Images with Background Colors
Another interesting design feature is to combine images with background colors, giving a tint or overlay effect. This can be particularly effective when working with icons or transparent PNGs.
struct ContentView: View {
    var body: some View {
        ZStack {
            Color.yellow
                .edgesIgnoringSafeArea(.all)

            Image(systemName: "star.fill")
                .resizable()
                .foregroundColor(.white)
                .scaledToFit()
                .frame(width: 100, height: 100)
        }
    }
}
In this example, a system image named `star.fill` is utilized. The image is white, which contrasts well against the yellow background. The combination of colors and images can add depth and visual interest to your SwiftUI designs.
Conclusion
Setting background colors in SwiftUI is both versatile and straightforward. Whether you’re working with individual views or trying to set the tone for an entire screen, the built-in tools and modifiers in SwiftUI have got you covered. As you continue your journey with SwiftUI, you’ll find that these background settings are just the tip of the iceberg when it comes to the design capabilities of this powerful framework.
You may also be interested in diving deeper into other iOS tools and techniques. Speaking of which, check out our iOS date picker tutorial for date display to enhance your expertise further.