The “Pull to Refresh” mechanism is a user interface pattern, often used in applications that display lists of data, allowing users to drag down from the top of the list to trigger a refresh. This is especially common in news feeds, social media apps, and mail clients. In this tutorial, we will explore how to implement the “Pull to Refresh” feature in an iOS app using Swift and UIKit.
Why Pull to Refresh Matters
Before diving into the technical details, it’s essential to understand why the “Pull to Refresh” feature matters. In today’s digital landscape, users expect real-time updates and fresh content at their fingertips. By integrating “Pull to Refresh,” you empower users to control when they receive updates, ensuring they never miss important information. Whether it’s the latest news articles, new social media posts, or refreshed email messages, this feature keeps your app’s content current and your users engaged.
How to Implement Pull to Refresh
A `UIRefreshControl` offers a conventional mechanism to trigger a refresh for the contents of a table view. Upon pulling it, a small spinner animates at the beginning of the view and continues until the refreshing process concludes. Once done, the spinner vanishes, and the view returns to its original position. In this guide, we’ll incorporate a refresh control into a table view. When activated, the sequence of the rows will invert. This guide utilizes Xcode 10 and targets iOS 12.
Launch Xcode and initiate a new Single View App.
- For the product name, label it as IOSPullToRefreshTutorial;
- Then, populate the Organization Name and Organization Identifier fields with your standard details;
- Ensure the language is set to Swift and click on Next;
- Head to the storyboard.
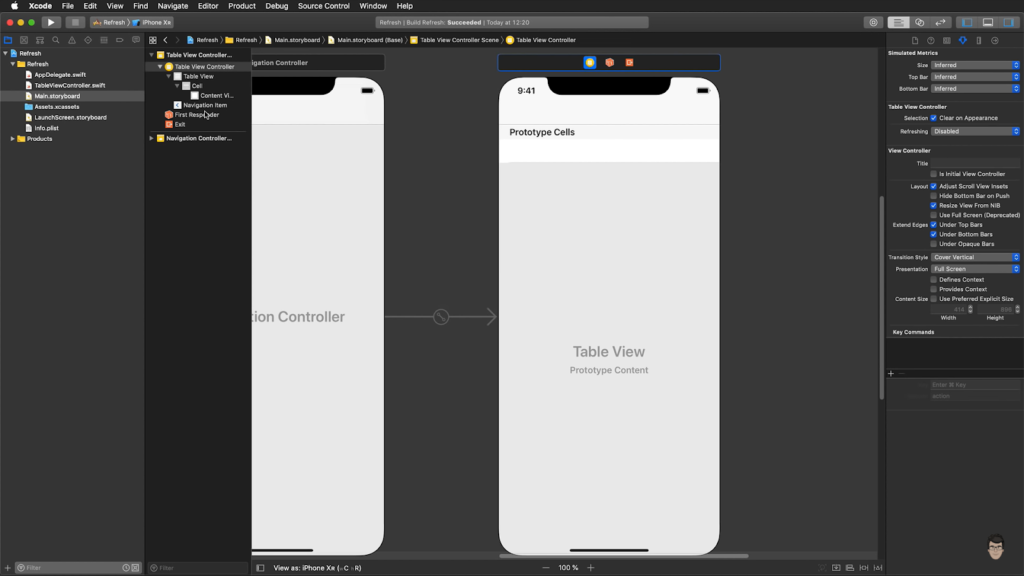
Clear the existing View Controller and introduce a Navigation Controller to the scene.
- This action will automatically include a Table View Controller;
- Highlight the Navigation Controller and navigate to the Attribute Inspector;
- Within the View Controller segment, tick the “Is Initial View Controller” option;
- Highlight the Table View Cell and transition to the Attributes Inspector. In the designated section for the Table View Cell, assign the Identifier as “Cell”.
With the View Controller eliminated from the Storyboard, you can also remove the `ViewController.swift` file from your project. To add a fresh file, navigate to iOS -> Source -> Cocoa Touch Class. Title this file `TableViewController` and ensure it inherits from `UITableViewController`.
Now, associate the `TableViewController` class with the Table View Controller present in the Storyboard. To do this, select the Table View Controller, head to the Identity Inspector, and in the Custom Class section, update the class to `TableViewController`.
In `TableViewController.swift`, initiate a property that houses an array consisting of the alphabet’s initial letters.
var alphabet = ["A","B","C","D","E","F","G","H","I"]The TableViewController class contains some boilerplate code. Change the following delegate methods
var alphabet = ["A","B","C","D","E","F","G","H","I"]
The TableViewController class contains some boilerplate code. Change the following delegate methods

override func numberOfSections(in tableView: UITableView) -> Int {
    // 1
    return 1
}

override func tableView(_ tableView: UITableView, numberOfRowsInSection section: Int) -> Int {
    // 2
    return alphabet.count
}

override func tableView(_ tableView: UITableView, cellForRowAt indexPath: IndexPath) -> UITableViewCell {
    // 3
    let cell = tableView.dequeueReusableCell(withIdentifier: "Cell", for: indexPath)
    cell.textLabel?.text = alphabet[indexPath.row]

    return cell
}- The Table View consists of a single section, so the numberOfSections(in:) method should return 1;
- The row count corresponds to the total items in the array, so we utilize the array’s count property;
- For each row, the corresponding alphabet letter from the array is set to the text property of the cell’s textLabel;
- Compile and execute the project.
With rows populated, let’s proceed to implement the refresh control. When the pull-to-refresh action is triggered, the rows will toggle between descending and ascending order. To begin, a Boolean variable is required to alternate the sorting order. Insert the subsequent property in the class interface section.
var isAscending = true
Change the viewDidLoad method.

override func viewDidLoad() {
    super.viewDidLoad()

    let refreshControl = UIRefreshControl()
    refreshControl.addTarget(self, action:  #selector(sortArray), for: .valueChanged)
    self.refreshControl = refreshControl
}
Whenever the refresh control is pulled, it will trigger the UIControlEvent.ValueChanged event, subsequently invoking the sortArray method. Let’s proceed to implement this method.
@objc func sortArray() {
    let sortedAlphabet = alphabet.reversed()

    for (index, element) in sortedAlphabet.enumerated() {
        alphabet[index] = element
    }

    tableView.reloadData()
    refreshControl?.endRefreshing()
}
Initially, the array undergoes reversal using the reverse function. Subsequently, enumeration through the reversed array takes place, with the reversed array being populated into the original alphabet array. Following this, the Table View is reloaded to ensure content updates, and the RefreshControl animation is terminated.
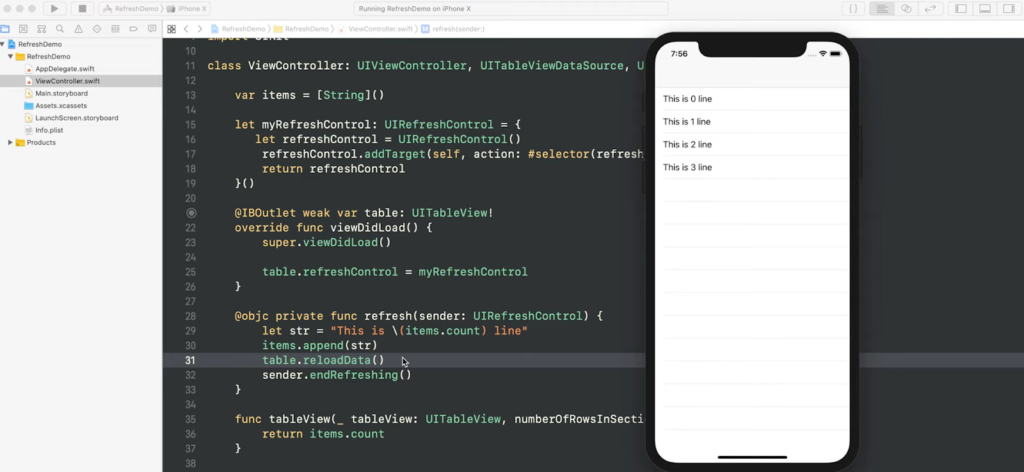
To observe the reversal of sorting order for table view rows, build and run the application. Perform a pull-refresh action several times.
You can access the source code for the IOSPullToRefreshTutorial from the ioscreator repository on Github for further details.
Feedback and Accessibility
Accessibility is a critical aspect of mobile app development. When implementing the “Pull to Refresh” feature, consider providing clear feedback to users with visual impairments. Ensure that VoiceOver and other accessibility features are properly supported, and provide meaningful accessibility labels and hints for the refresh control. Additionally, you can use haptic feedback to enhance the user experience further. A subtle vibration or tactile response when the refresh is triggered can provide users with a more tactile and engaging interaction, making your app feel more responsive and user-friendly.
Conclusion
The “Pull to Refresh” mechanism offers a natural gesture for users to fetch the latest data in an app. Leveraging `UIRefreshControl` in iOS with Swift and UIKit makes it straightforward to integrate this feature into your apps. Experiment with customizing the appearance and behavior of the refresh control to better suit the needs and branding of your app.